Posting Point
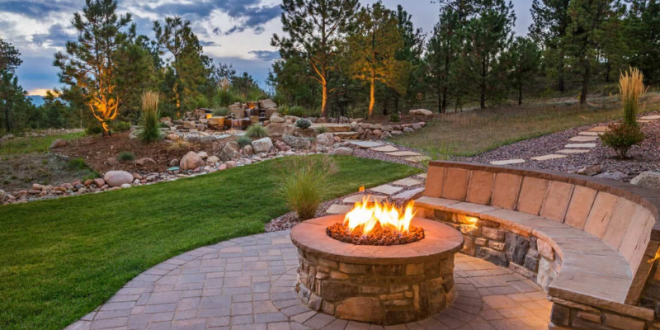
If you want to enjoy an outdoor bonfire without all the smoke, you might be interested in building your own DIY smokeless fire pit. Smokeless fires have existed for centuries, but they’re still not common enough to be considered the norm. Here’s how to build one at home and some of the benefits and drawbacks of using one over more traditional fire pits.
What You Will Need
Brick or stone pavers, sand, flat stones, tongs or shovels, campfire ring (optional), and stone fire pit liners. To look great and stay functional over time, you will also need bricks or cement. These are small enough to be purchased from any home improvement store for about $10-20 per bag.
They will last for years if taken care of properly and should be able to handle several fires without having to be replaced. Brick pavers may cost more than concrete, but they’re easier to work with because of their lightweight nature; both will work fine, so choose whatever looks best in your garden space.
Step 1: Cut the Fire Bricks
They use 3/4 firebricks (as recommended in Step 1), using either mortar or construction adhesive to glue them in a square. The bricks should sit directly on top of each other. Don’t worry about perfect placement at first; eyeball it and get an idea of where they’ll go; back later and fill any gaps with mortar.
Make sure you use enough pressure so that all parts of each brick are glued together; don’t be afraid to push hard on it with your hand or foot. Be careful not to break any pieces while doing so! It’s okay if some larger cracks occur while gluing because we will be filling those in later.
Step 2: Place the Fire Bricks on Base
After removing any paint or dirt from your bricks, please place them in your base and start stacking them until they are aligned. You may need another person’s help with making sure all of your fire bricks are even and do not wobble.
Depending on how large you want your fire pit to be, try and use 6-8 fire bricks stacked as high as possible. The higher you stack these layers, the longer it will take for your fire pit to heat up! Depending on where you live and if you live somewhere cold, keep in mind that it will take longer for your fire pit to heat up due to lower temperatures.
Step 3: Pour Wet Gravel on Top of Base
To give your fire pit some structure, you’ll want to cover your base with wet gravel. Although most experts don’t recommend using rocks and other heavy materials directly on top of fire pits (they could get too hot), gravel is okay because it doesn’t produce as much heat.
Add enough water so that about half of your gravel base is underwater, then let it sit overnight. This will allow everything to settle and ensure you have nice level ground for your fire pit.
Step 4: Cover with Dry Sand
Cover your tinder bundle with dry sand. Your tinder bundle should now be surrounded by sand. This layer of sand will act as an insulator and help protect your fuel from being extinguished by moisture in the air.
Ensure no gaps between your tinder and sand; leave nothing exposed. After you’ve covered your flammable materials, give everything a light sprinkle of water from either side of your bowl (or above if you’re making a pit).
The idea is to put out any sparks or tiny flames so that only one or two hot embers are exposed when you finish building your fire… don’t allow anything but smoke to come out of your fire pit!
Step 5: Put Your Rocks in Place
Once you’ve stacked your flat rocks, add smaller rocks and stones on top of them. You can either place them all around the edges or fill in any gaps that might be left in between. Don’t worry if your fire pit doesn’t look perfect—what matters is it works!
Step 6: Add Your Wood
If you’re burning wood, add it to your fire pit. Use hardwoods like oak, hickory, or mesquite since they produce heat that lasts long. Hardwoods also have less smoke than softwoods such as pine or cedar, making them ideal for use in fire pits.
Place them between charcoal layers and light them with your lighter or matches to add wood chunks. If you’re using logs or branches instead of whole pieces of wood, chop up larger pieces into 3-to-5-inch sections so they fit easily on top of your coals and burn more evenly.
Keep in mind that smaller bits will smolder and smoke; larger bits are best if you want flames but little smoke while burning something like pine.
Step 7: Let it Burn!
We’re almost done! If you’ve done everything right up until now, your fire pit should be relatively smoke-free. But that doesn’t mean it can just burn away by itself. Every few minutes or so, give your fire pit another good toss.
This will ensure an even burn throughout, which gives you that delicious brick-like appearance as it burns down. Plus, it will keep any smoldering embers at bay, so they don’t start again later.
Frequently Asked Questions
Can you make your smokeless fire pit?
Just how easy is it to build your smokeless fire pit? It turns out, very. To start, you’ll need some basic materials that can be found at most hardware stores: A 55-gallon drum or large metal trash can, sand and concrete mix, fireproof gloves, and a screen.
Once you’ve collected all of your ingredients, place a layer of sand in the bottom of your container—roughly 1 foot deep—then add your screen on top. Place another layer of sand over the top, about 18 inches worth.
Pour concrete mix into cracks in the floor and set enough water around edges for concrete to seep in as it sets (this keeps cracks from appearing). Finally, insert rebar rods into pre-drilled holes on top and light that sucker up!
How do you make a smokeless fire pit?
You’ll want a best smokeless fire pit for your next camping trip, backyard barbecue, or tailgate party. But you don’t want it to produce smoke, especially if there’s any chance of rain in your forecast. Building one is easy: All you need is a 55-gallon drum, eight bags of sand, and one sheet of half-inch plywood. Here’s how
How much does it cost to build your fire pit?
It’s easy to look at photos of fire pits and assume they are affordable, but there is more to these patio accessories than meets the eye. Your custom fire pit could cost thousands of dollars, depending on what you have in mind.
The best way to stay on budget is by using reclaimed materials. Start by looking for inexpensive items around your home like aluminum cans, old piping, other scrap metals, and glass bottles.
By recycling materials that might otherwise go into a landfill and reusing them for something functional and beautiful (like an outdoor centerpiece), you will save money and help reduce waste in landfills across America.
Final Words
Hunker down around your homemade smokeless fire pit with good friends and family while making memories in your backyard! It’s one of those projects that will be there for you and your family year after year. Like most projects, it may not look like much when you start. But by taking care and following instructions, you can create something unique to you and something you can enjoy for years to come. And who knows? You might even want to make another one for your garden or a friend! So get ready, grab some tools, layout some construction paper, dig in and get building! Before long, that pile of dirt in your backyard will be transformed into something special.